


DevOps is about closing the chasm between development and operations. While Kubernetes has a steep learning curve, the flip side of the coin are incredible flexibility and features such as service discovery, cluster orchestration, self-healing capabilities, auto-scaling, etc. I like to challenge teams to consider adopting Kubernetes in development as a way to tame that learning curve.
This guide has succeeded when you feel comfortable in taking the first steps towards developing on a local Kubernetes cluster. It won't cover how to configure Kubernetes manifests, instead it helps you overcome your first hurdles. The guide is written for MacOS and I recommend a hands-on approach by tagging along with the following repository:
git clone git@github.com:WitoDelnat/blog-local-kubernetes-dev.gitWithin the repository you can find a minimalistic Express server, Dockerfile and Kubernetes manifests. The server has three endpoints through which we will progress together:
/helloto access your service./hello-gcpto access cloud services./hello-pgto access your database.
The local cluster
brew install minikubeLet's start by creating a minikube cluster that is properly configured.
minikube config set vm-driver hyperkit
minikube config set disk-size 25000
You should configure these two parameters before starting your minikube cluster. The default VM driver doesn't support the ingress addon. The default disk size sometimes runs into disk is full errors. It's better to avoid them prematurely as disk space shouldn't be a constraint. You can also consider setting cpus and memory depending on your requirements. Default values are 2 cpus and 2048 MB. Minikube persists the configuration so you only have to execute it once. You can view your current configuration in ~/.minikube/config/config.json.
minikube start --uuid 00000000-0000-0000-0000-000000000001Executing this command will handle all the plumbing in the background: it creates a virtual machine, deploys the latest Kubernetes control plane, and configures kubectl with a minikube context. The static uuid maintains the same IP address when recreating the cluster.
Let's go over a few handy commands:
minikube stopturns off the VM. It's useful to preserve battery while not developing. All data will be restored on the nextminikube start.minikube deleteon the other hand deletes all data and allows a fresh start.minikube dashboardallows inspecting resources through a UI. This is accessible for beginners though I recommend to move towards k9s as soon as possible.minikube sshallows exploring the VM and is useful for troubleshooting Docker.
The deployment
brew install skaffoldYou can try to deploy with kubectl apply -f k8s. The deployment will quickly run into a wall because of container images. Remember that minikube runs the cluster within a virtual machine and thus can't access your local images. The documentation suggests five ways to push your image into the minikube cluster. This works even though it becomes tedious to change code, build the image and push it into minikube. Skaffold automates this workflow for fast and simple local Kubernetes development. I tend to introduce it as Docker Compose for Kubernetes.
skaffold init
skaffold dev
The tool scans the repository for Kubernetes manifests and images which it links to Dockerfiles. The output is a generated skaffold.yaml file which acts as input for the second command. This command is your bread and butter to development: it determines the image tag, builds the image and deploys your application. Changed some code? Skaffold automatically restarts the cycle.

Hot-reload servers. Configuring Skaffold with file sync enables servers with hot-reload. It's decent but brief sync delays fail to give the snappy experience you are accustomed to. It doesn't really bother me as tests are my main development driver, though I understand that for some developers it might be a dealbreaker.
Accessing services (/hello)
minikube addons enable ingresMinikube addons are predefined, templated Kubernetes manifests. The ingress addon deploys a default ingress-controller. Alternatively, nothing prevents you from manually deploying a custom ingress-controller such as Traefik or Istio. You can check all available addons with minikube addons list and inspect their manifests in this repository.
echo $(minikube ip) api.example.local | sudo tee -a /etc/hostsThe default ingress-controller is directly exposed on the IP address of minikube's VM. Adding an entry to your hosts file will allow you to use ingres rules with hostnames. As a result, the application is now reachable on http://api.example.local/hello.
Custom ingress-controllers are usually not directly exposed on this IP address. You can instead use minikube tunnel in case of a LoadBalancer service or minikube service in case of a NodePort service. The last and most generic option is to use port-forwarding. This technique is commonly used to debug any service or pod and is not limited to minikube. You can use kubectl port-forward directly or use one of the many convenient tools such as k9s (with shift-f on a pod), kubefwd, kube-forwarder (with UI).
Accessing Google Cloud Platform (/hello-gcp)
gcloud auth application-default login
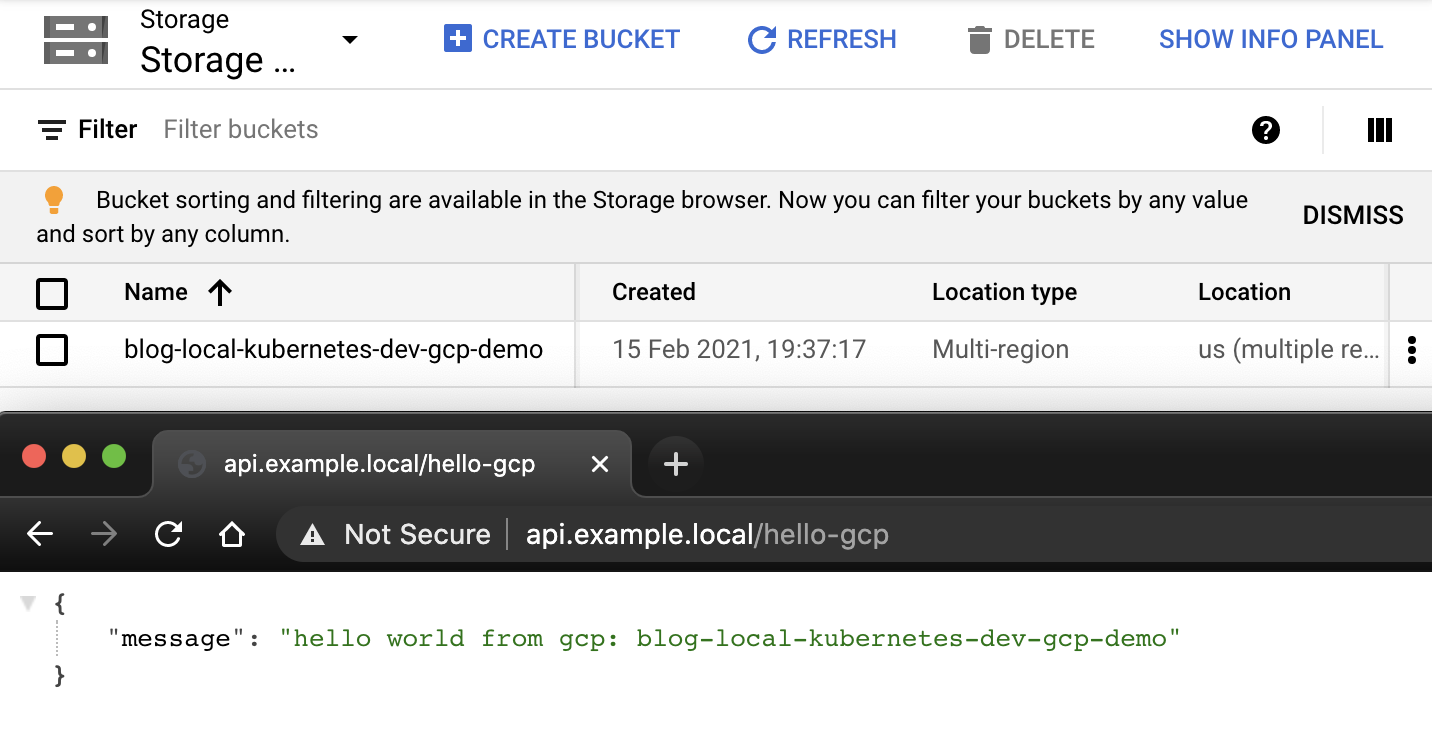
minikube addons enable gcp-authThis step is only necessary when you want to integrate with Google Cloud services. It acquires credentials for developing code as an easy alternative to configuring service account key files. The gcp-auth addon will deploy an advanced Kubernetes mutating webhook feature. Long story short, it intercepts pods and modifies them - in this case by adding the application-default credentials file which Google Cloud client libraries use to authenticate the application. Given that you have permissions to list buckets, that's all necessary to make our second endpoint work: http://api.example.local/hello-gcp.
minikube addons configure registry-creds
Do you want to enable Google Container Registry? [y/n]: y
-- Enter path to credentials (e.g. /home/user/.config/gcloud/application_default_credentials.json):/Users/witodelnat/.config/gcloud/application_default_credentials.json # Note: use absolute path!
-- Do you want to change the GCR URL (Default https://gcr.io)? [y/n]: y
-- Enter GCR URL (e.g. https://asia.gcr.io):https://eu.gcr.io
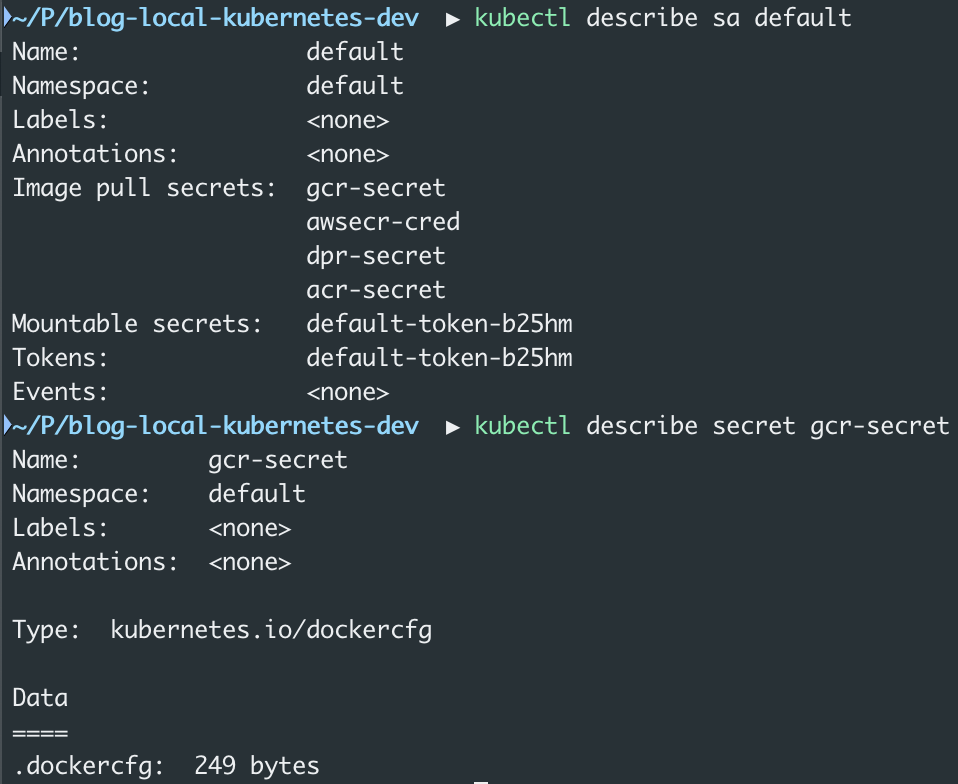
minikube addons enable registry-credsBesides accessing Google Cloud services, you might simply want to use the Google Cloud Registry for private images. The registry-creds addon will deploy a tool that enhances each default service account with ImagePullSecrets which permits pulling private images. Feel free to validate it with kubectl describe sa default or check the image below. Do mind that custom service-accounts will require adding gcr-secret manually! You can read more about it here, here and here.
Accessing Postgres (/hello-pg)
kubectl run database \
--image postgres \
--port 5432 \
--expose \
--env POSTGRES_DB=api-db \
--env POSTGRES_USER=api-user \
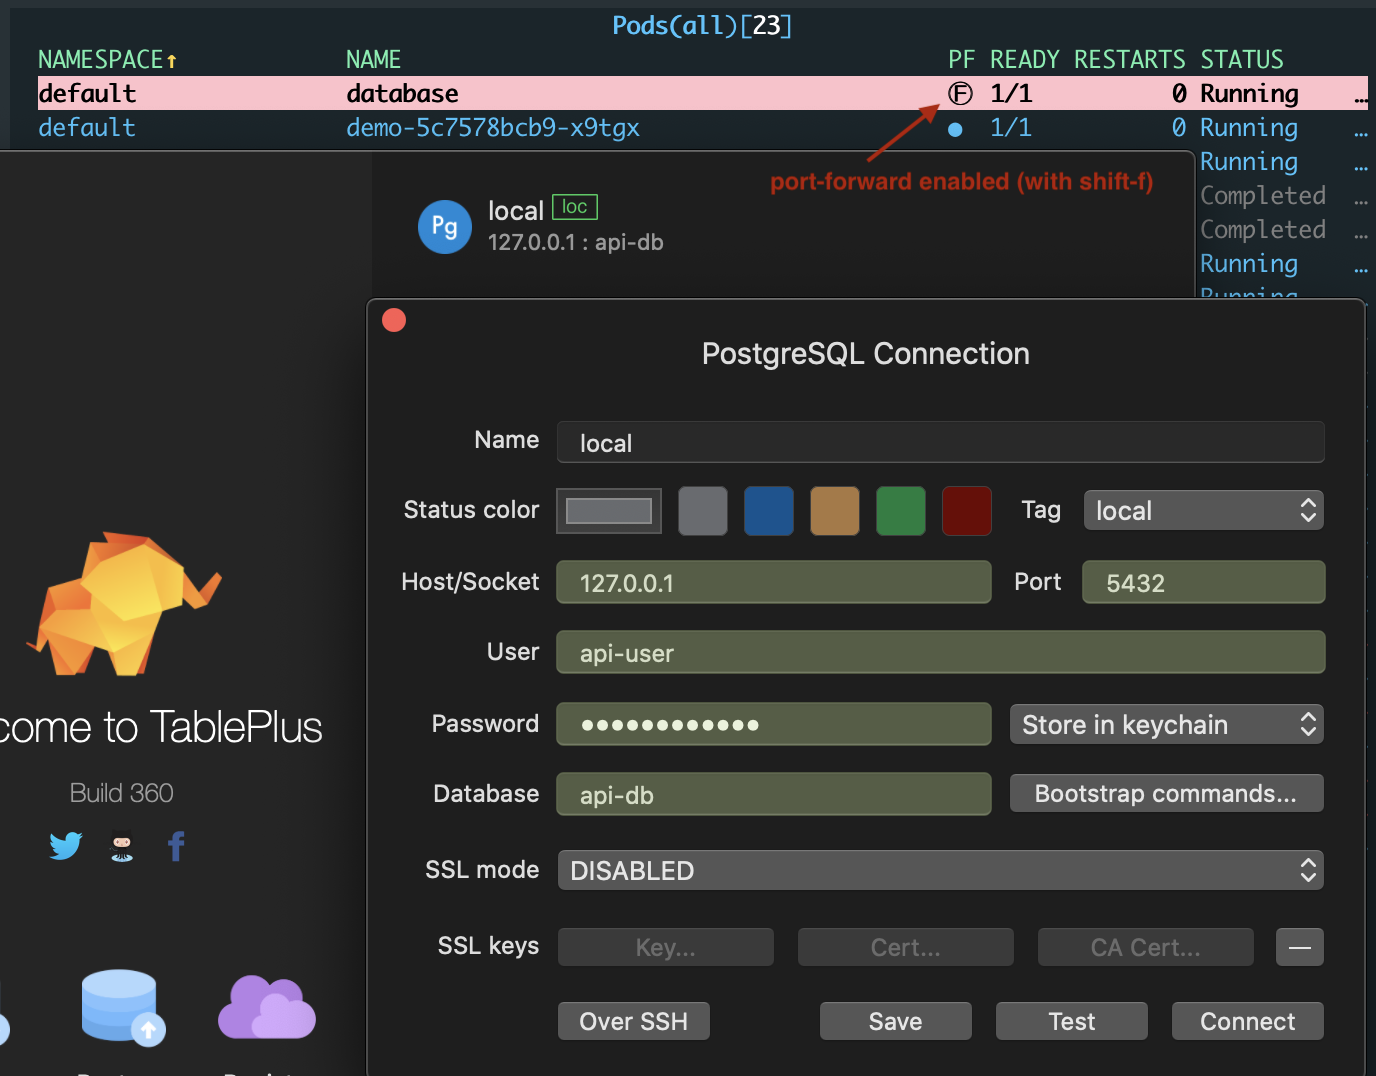
--env POSTGRES_PASSWORD=api-passwordMicroservices are designed stateless to scale horizontally yet often fail to escape the need of persistency. Quickly bootstrapping a postgres database should feel familiar to Docker users. The command launches a single pod with a postgres container and exposes it with a service. Browsing to http://api.example.local/hello-pg will succeed as the demo is preconfigured with the following connection string: postgresql://api-user:api-password@database:5432/api-db. You can also connect to the database with port-forwarding and your tool of choice.
One alternative is to include the database as a Kubernetes manifest.
It's powerful to spin up a complete development environment in a single skaffold dev command.
Do mind that this will add complexity as local and other environments have split.
Standard Kubernetes manifests do not suffice from this point onwards.
The easiest way is to learn Kustomize which Skaffold supports out of the box.
Helm is another possibility, though you should refrain from using Helm.
Besides multi-environments, you can also start dipping your toes into stateful components.
Both static and dynamic volumes work within minikube.
The latter uses the default StorageClass that is automatically provisioned by the storage-provider addon. As a sneak peak, you can git checkout with-stateful-multi-env to see what this could look like. There is no rush in sprinting towards this point. The magic of local Kubernetes development is that you can learn it step by step.
Closing thoughts
Throughout this guide, you created a properly configured cluster and deployed an application. Afterwards, you learned how to access your services. Applications rarely stand alone which is why you also saw how to connect with cloud services and databases. While this is a decent starting point, you were also shown the possibilities to evolve towards stateful, multi-environment deployments.
I hope that this guide addresses the misconception that this sort of development slows you down. In essence, minikube start and skaffold dev will get you going day-to-day. The benefits since I started to develop on Kubernetes are enormous. I feel more confident in all tasks beyond development. I also have less stress when failures happen because I know how to deal with them. In the end, it's all about familiarity.

